Saturday, 3 September 2022

Bosch Dishwasher Not Draining E24

It’s no secret that the dishwasher is one of the most indispensable appliances in the modern home. But what happens when it starts to malfunction? One common problem is that the dishwasher will not drain properly, resulting in water pooling on the floor. If this happens to you, don’t panic! There are a few things you can do to try and fix the issue yourself before calling for professional help.

Bosch dishwashers have a solid reputation and are especially recognized for their reliability. Despite the fact that these dishwashers are robust, there may be times when your Bosch dishwasher is having an issue, such as the e24 error code.
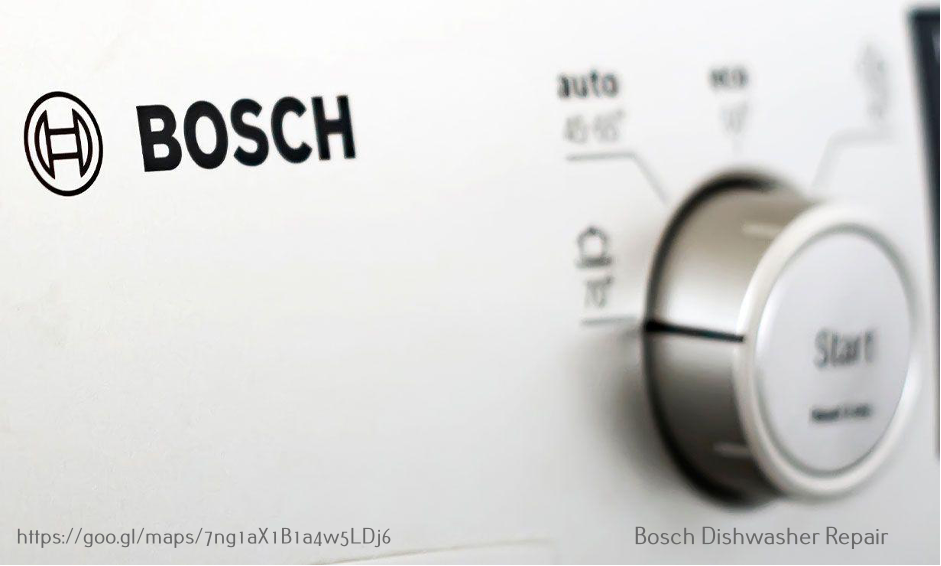
Bosch dishwasher not draining

What is the e24 error code?

According to Bosch, the e24 error message indicates that the dishwasher’s drain filter or pump is clogged. However, there are additional reasons for the problem then a blocked drain hose, kinked hoses, a clogged air gap, or the disposal plug not being removed. If all of these components do not solve the problem, there may be a control board failure that is triggering a false error code.

How to troubleshoot a Bosch dishwasher that is not draining properly

If you have a Bosch dishwasher not draining properly, there are several things you can do to troubleshoot the problem. To begin, unplug the dishwasher before inspecting any internal components.

Step 1: Check it’s not a glitch

The first thing you’ll want to do is check for a glitch. Unplug the dishwasher from the power outlet and then plug it back in after 5 minutes. If the dishwasher does not have a power cord, flip the circuit breaker off and then on again. Once you’ve done this, run a test cycle and see if the dishwasher drains properly.

Another thing to try is holding the start button down, which should also reset the dishwasher and turn on the draining cycle in order to remove water from the dishwasher. If you press the start button but nothing happens, it indicates that it isn’t a bug and that there is a drainage problem to be addressed.

Step 2: Inspect the dishwasher’s drain hose

Once you’ve checked for a power issue, the next thing you’ll want to do is inspect the dishwasher’s drain hose. The first thing you should do is check to see if the hose is kinked or bent in any way. If it is, this could be restricting water flow and causing the dishwasher to not drain properly.

You should also check to see if the dishwasher’s drain hose is connected to the garbage disposal. If it is, make sure that the knockout plug has been removed. The knockout plug is a small, plastic piece that is located near where the dishwasher’s drain hose connects to the disposal. Once you’ve removed the plug, water should be able to flow freely and the dishwasher should drain properly.

Step 3: Clean the sump and filter

If the dishwasher still isn’t draining properly, the next thing you should do is clean the sump and filter. The sump is located at the bottom of the dishwasher and houses the motor, pump, and other components. To access it, you’ll need to remove the dishwasher’s kickplate.

Once you’ve removed the kickplate, you should be able to see the sump. Use a flashlight to look inside and see if there is any food or debris clogging the area. If you see anything, use a brush or your hands to remove it.

You should also clean the dishwasher’s filter. The filter is located just above the sump and can be accessed by removing the upper rack. You should be able to see the filter once you’ve removed the rack. Clean it with a brush or your hands to remove any debris or food that may be clogging it.

Step 4: Check the air gap

The next thing you’ll want to do is check the air gap. The air gap is located on the back of the dishwasher and is responsible for preventing water from backing up into the dishwasher. If the air gap is clogged, it could be causing the dishwasher to not drain properly.

To clean the air gap, simply remove it from the dishwasher and clean it out with a toothpick or other small object. If your dishwasher still will not drain properly after cleaning the air gap, then there may be a more serious problem that will require the help of a professional.

Conclusion

The most likely cause of a dishwasher not draining properly is food or other debris clogging the drain. However, there are a few other potential causes, such as a clogged air gap or a problem with the drainage hose. If you’ve tried all of the above solutions and your dishwasher still won’t drain, then you may need to call a professional for help. Thanks for reading!

We hope this article was helpful. If you have any further questions, please feel free to leave a comment below, and we will be happy to help. https://advanceappliancerepair.ca/


from Toronto Appliance Repair | Advance Appliance Repair https://advanceappliancerepair.ca/bosch-dishwasher-not-draining/

Sunday, 21 August 2022

GE Fridge Is Not Cooling But Light is On

Many people find that refrigerators are a useful convenience in their lives. They can store food and drinks for long periods of time, and keep them cold so that they are refreshing to consume. However, sometimes refrigerators can have issues where they are not cooling properly. This can be frustrating, as it can cause the food and drinks inside to spoil.

You may check a list of possible problems at home with the few equipment and some basic knowledge. The light in your fridge is on because it is receiving power. This does not necessarily mean that the fridge is cooling properly. If your fridge is not cooling, there are a few things you can check before calling a repairman.

electrolux dishwasher repair north york

1) Check Temperature Settings

The first thing you should do is check the temperature settings. Make sure that the fridge is set to a cool enough temperature. It is also possible that the fridge is set too low, which can cause it to stop cooling. If the fridge is set too low, increase the temperature and see if this solves the problem.

Temperature settings are usually located inside the fridge, on the door, or in the control panel. You may need to consult your fridge’s manual to find the exact location.

2) Check for Blockages

Next, you should check for any blockages in the fridge. Blockages can prevent cold air from circulating properly, causing your fridge to warm up.

To check for blockages:

  • Remove everything from the fridge and freezer sections
  • Check the back of the fridge for any obstructions
  • Check the vents on the sides of the fridge and make sure they’re not blocked
  • If you have a self-defrosting fridge, make sure the defrost drain is clear

The blockages could be caused by food, dirt, or other debris. If you find any blockages, remove them and see if the fridge starts cooling properly.

3) Clean the Condenser Coils

If the condenser coils are dirty, they won’t be able to cool the fridge properly. The coils are usually located on the back of the fridge.

To clean the coils:

  • Unplug the fridge and move it away from the wall
  • Locate the coils and use a vacuum to remove any dust or dirt
  • If the coils are very dirty, you can use a coil cleaning brush to scrub them clean
  • Once you’ve cleaned the coils, plug the fridge back in and see if it’s cooling properly.

4) Check the Door Seal

If cold air is escaping from your fridge, it could be because the door seal is damaged. A damaged door seal can cause your fridge to work overtime to keep the temperature inside the fridge consistent, which can lead to the fridge not cooling properly. To check the door seal, open the fridge door and place your hand inside the seal. If you feel a draft, then the door seal needs to be replaced.

5) Problem with Compressor

One of the most common reasons why a fridge is not cooling is because the compressor is not working properly. The compressor is responsible for circulating coolant through the fridge, so if it’s not working, the fridge will not be able to properly cool down.

If you think the problem might be with the compressor, there are a few things you can do to check.

1) First, see if the compressor is running. If it’s not, then that’s likely the problem.

2) Next, check to see if the compressor is getting power. If it’s not, then that could be the issue.

3) Finally, listen to see if the compressor is making any strange noises. If it is, then that could be an indication that something is wrong.

If you think the problem is with the compressor, then you’ll need to call a repairman to come and take a look. It’s not something you’ll be able to fix on your own.

6) Evaporator Fan

If the compressor is running but the fridge is still not cooling, then the problem might be with the evaporator fan. The evaporator fan is responsible for circulating air through the fridge, so if it’s not working, the air inside the fridge will not circulate properly and the fridge will not cool down.

To check if the evaporator fan is working, open the fridge and listen for a humming noise. If you don’t hear any noise, the fan is not working and needs to be replaced.

Final Thoughts

The GE refrigerator is a versatile and reliable appliance. However, like all appliances, it can sometimes experience problems. If your GE fridge is not cooling but the light is on, follow the above steps to troubleshoot the issue. With a little time and effort, you should be able to fix the problem and get your fridge working again.

If the problem persists, or you are unable to fix the issue, contact Advance Appliance Repair for assistance. They can help you fix your fridge quickly. We hope this article was helpful. Thanks for reading!


from Toronto Appliance Repair | Advance Appliance Repair https://advanceappliancerepair.ca/ge-fridge-is-not-cooling-but-light-is-on/

Sunday, 31 July 2022

Why Is My Whirlpool Washer Not Spinning?

Whirlpool washers are some of the most reliable and popular machines on the market. But even the best machines can experience problems from time to time. There are a few different reasons why your Whirlpool washer might not be spinning. In this article, we’ll explore some of the most common causes of this problem and what you can do to fix them. let’s get started!

washing machine no drain

Reasons Why Whirlpool Washer Not Spinning – Let’s Fix It

The most common reasons for a Whirlpool washer not spinning are:

1) Unbalanced or Jammed Load

The first thing you should check if your Whirlpool washer is not spinning is whether or not the load is unbalanced or jammed. An unbalanced load can cause the washer to vibrate excessively and eventually stop spinning. To fix this, simply redistribute the clothes in the washing machine so that they are evenly distributed.

If the problem persists, there may be something caught in the washing machine that is preventing it from spinning. Check the washer for any foreign objects such as coins, buttons, or pieces of clothing. Remove these items and try again.

2) Faulty Lid Switch

Another common reason for a Whirlpool washer not spinning is a faulty lid switch. The lid switch is a safety feature that prevents the washer from spinning when the lid is open. If this switch is faulty, it can prevent the washer from spinning even when the lid is closed.

To test the lid switch, open the door of the washing machine and try to start the spin cycle. If the washer does not start spinning, then the lid switch is likely the problem.

3) Worn Out Drive Belt

A frayed drive belt is another typical reason for a Whirlpool washer to not spin. The drive belt is responsible for transferring power from the motor to the washing machine’s spin cycle. over time, this belt can become worn out or damaged, causing the washer to not spin.

To check if the drive belt is the problem, open up the washing machine and locate the belt. If it is visibly frayed or damaged, it will need to be replaced.

4) Faulty Motor

If the drive belt is not the problem, then it is likely that the motor is faulty. The motor is responsible for powering the washing machine’s spin cycle. If it is not working properly, the washer will not spin.

To test the motor, remove the drive belt from the washing machine and try to start the spin cycle. If the washer does not start spinning, then the motor is likely the problem.

5) Clogged Drain Pump

Another common issue that can cause a Whirlpool washer to not spin is a clogged drain pump. The drain pump helps to remove water from the washing machine during the spin cycle. If it is clogged, it can prevent the washer from spinning.

To clean the drain pump first unplug the washer and then remove the back panel. Locate the drain pump and clean it out with a brush or a vacuum. You may also need to replace the drain pump if it is damaged.

6) Door Lock & Interlock Issues

If your Whirlpool washer has a door lock or interlock issue, it will also not spin. The door lock is a safety feature that prevents the washer from starting if the door is not closed. If this lock is faulty, it can prevent the washer from spinning.

To test the door lock, try to start the washer with the door open. If the washer does not start, then the door lock is likely the issue. To fix this, you will need to replace the door lock.

Bottom Line

There are a few different reasons why your Whirlpool washer might not be spinning. In this article, we’ve explored some of the most common causes of this problem and what you can do to fix them. With these tips in mind, you should be able to get your washing machine up and running in no time!

We hope you found this article helpful. If you have any further questions or concerns, please feel free to reach out to us at Advance Appliance Repair at any time. We’re always happy to help!


from Toronto Appliance Repair | Advance Appliance Repair https://advanceappliancerepair.ca/why-is-my-whirlpool-washer-not-spinning/

Wednesday, 6 July 2022

What To Do When Your Refrigerator Not Cooling

If you are one of the many people who find themselves in the unfortunate position of having a refrigerator not cooling issue, you may be wondering what to do. Do not worry, help is on the way. This article will provide you with some tips on how to deal with this situation.

First of all, it is important to understand that there are a number of potential causes for a refrigerator not cooling. It could be something as simple as a dirty condenser coil or it could be something more serious like a Freon leak. In any case, it is important to troubleshoot the problem so that you can determine the best course of action.

commercial fridge not cooling

Steps to Take When Your Refrigerator Not Cooling

There are a few things that you can do when your refrigerator not cooling. These steps will help you troubleshoot the problem and determine the best course of action.

1) Check the condenser coils.

If the coils are dirty, they will not be able to effectively remove heat from the refrigerator. This can lead to the fridge not cooling properly. Clean the coils with a vacuum cleaner or a coil brush.

You need to clean the coils on your refrigerator every 6-12 months. The process is simple and only takes a few minutes. In order to clean the coils, you will need to:

  • Unplug the refrigerator from the power outlet.
  • Locate the coils. The coils are usually located on the back of the fridge.
  • Use a vacuum cleaner with a hose attachment to vacuum the coils. You can also use a coil brush to clean the coils.
  • Once the coils are clean, plug the refrigerator back in and turn it on.

2) Check the door gasket.

The gasket is the rubber seal that runs around the edge of the fridge door. If this seal is damaged, it can cause cool air to leak out of the fridge. Inspect the gasket for any cracks or damage.

If you find any, you will need to replace the gasket. In order to do this, you will need to find a replacement gasket that is the same size and shape as the old one. After that, simply remove the old gasket and replace it with the new one.

3) Check the thermostat.

The thermostat controls the temperature inside the fridge. If it is set too high, the fridge will not cool properly. Adjust the thermostat to a lower setting and see if that fixes the problem.

It is also possible that the thermostat is not working properly. In this case, you will need to replace it. You can buy a replacement thermostat from most hardware stores.

4) Check for leaks.

If you suspect that there is a leak, you will need to call a professional to repair it. Leaks can be difficult to find and repair on your own. You can check for leaks by looking for ice buildup around the seal of the door.

In order to repair a leak, you will need to:

  • Unplug the refrigerator from the power outlet.
  • Locate the source of the leak.
  • Use a sealant to seal the leak.

5) Check the evaporator coils.

The evaporator coils are located in the freezer. If these coils are frosted over, it can prevent cool air from circulating properly. Defrost the coils with a hair dryer or a heat lamp.

Conclusion

These are just a few things that you can do if your refrigerator not cooling. If none of these steps fixes the problem, you may need to call a professional appliance repair company for help. You can also check the owner’s manual for your fridge repair. It may have additional troubleshooting tips that can help you fix the problem.


from Toronto Appliance Repair | Advance Appliance Repair https://advanceappliancerepair.ca/things-you-can-do-when-your-refrigerator-not-cooling/

Wednesday, 27 April 2022

Advanced Appliance Repair: The Best Provider of Appliance Repair Services in North York, Ontario

Looking for a reliable and experienced appliance repair service? Look no further than Advance Appliance Repair! We are the best provider of appliance repair services in North York, Ontario. Our team of experts can help you with any type of repair issue that you may be experiencing with your appliances. We understand how important it is for you to have your appliances running smoothly, so we offer fast and efficient service that will get your appliances up and running again in no time!

TOP REASONS FOR WHY YOU CHOOSE US:

Best appliance repair North York

1) 24 Hrs A Day, 7 Days A Week Service

Our team of experts are available 24 hours a day, seven days a week to help you with any type of appliance repair issue that you may be experiencing. No matter what time it is, we will be there to help you get your appliances up and running again.

We offer fast and efficient appliance repair services in North York, Ontario. Our team of experts can help you with any type of repair issue that you may be experiencing with your appliances. We understand how important it is for you to have

2) Factory Original Parts OEM

We only use factory original OEM parts for all of our appliance repairs. This ensures that your appliances are repaired with the highest quality parts available on the market. You can trust that our team of experts will get your appliances up and running again in no time. We offer fast and efficient appliance repair services in North York, Ontario.

Our team of experts can help you with any type of repair issue that you may be experiencing with your appliances. We understand how important it is for you to have your appliances running smoothly, so we offer fast and efficient service that will get your appliances up and running again in no time.

3) No Hidden Fees

There are no hidden fees when you choose Advance Appliance Repair for your appliance repair needs. We believe in being upfront and honest with our customers, so you can be sure that there will never be any surprises when it comes to the cost of our services. We offer fast and efficient appliance repair services in North York, Ontario.

Our team of experts can help you with any type of repair issue that you may be experiencing with your appliances. We understand how important it is for you to have your appliances running smoothly, so we offer fast and efficient service that will get your appliances in working order in a timely manner.

4) Licensed And Insured

Advance Appliance Repair is a licensed and insured appliance repair company. This means that you can rest assured knowing that your appliances are in good hands when you choose us for your repair needs. We offer fast and efficient appliance repair services in North York, Ontario.

Our team of experts can help you with any type of repair issue that you may be experiencing with your appliances. We understand how important it is for you to have your appliances running smoothly, so we offer fast and efficient service that will get your appliances up and running again quickly.

5) Repair All Makes And Models

Our team of experts is qualified to repair all makes and models of appliances. No matter what type of appliance you have, we can help you get it up and running again in no time. We offer fast and efficient appliance repair services in North York, Ontario.

If you are having any issues with your appliances, don’t hesitate to give us a call. Our team of experts will be more than happy to help you get your appliances back up and running again quickly. We understand how important it is for you to have your appliances working properly, so we offer fast and efficient service that will get your appliances fixed by the end of the day.

Summery

Advance Appliance Repair is the best provider of appliance repair services in North York, Ontario. Our team of experts are available 24 hours a day, seven days a week to help you with any type of appliance repair issue that you may be experiencing. We only use factory original parts for all of our appliance repairs, so you can be sure that your appliances are repaired with the highest quality parts available. We also offer a no hidden fees policy, so you can be sure that there will never be any surprises when it comes to the cost of our services. Give us a call today to schedule a repair appointment. We look forward to helping you.

Advance Appliance Repair
1 Elmhurst Ave Unit 555
North York, ON M2N 6B1
(647) 363-5208


from Advance Appliance Repair https://advanceappliancerepair.ca/best-appliance-repair-services-in-north-york-ontario/

Tuesday, 26 April 2022

Electric Stove Not Heating Up? Here’s What You Can Do About It.

An electric stove not heating up can be a real inconvenience, especially if you’re in the middle of cooking dinner. In this blog post, we will discuss some common reasons why your electric stove might not be heating up, as well as some solutions that you can try.

stove not heating

1. The Element Won’t Light

One common reason why your electric stove may not be heating up is because the element won’t light. This could be due to a number of reasons, such as a blown fuse or a tripped circuit breaker. If you suspect that this is the problem, check your home’s fuse box or circuit breaker and reset it if necessary.

If the element still won’t light after you’ve reset the fuse or circuit breaker, it may be because the element itself is defective and will need to be replaced. Another possibility is that there is something wrong with the wiring between the element and the stove.

2. The Switch Is Defective

Another possibility is that the switch is defective. The switch is what controls the flow of electricity to the element, so if it’s not working properly, the element won’t heat up. You can try replacing the switch yourself, but if you’re not comfortable doing that, you should call an appliance repair company. Once you’ve replaced the switch, try turning on the stove again. If it still doesn’t work, there may be a problem with the wiring or another component of the stove.

3. The Wire Harness Is Damaged

The wire harness is what connects the various components of the stove to each other. If the wire harness is damaged, it can cause the stove to malfunction in a number of ways, including preventing the element from heating up. To repair a damaged wire harness, you will need to call an appliance repair company.

It’s not recommended to DIY wire harness repairs as it can be dangerous. If you’ve tried all of these solutions and your electric stove still isn’t heating up, the problem may be with the stove itself and you will need to call an appliance repair service. Electric stoves are complex appliances, so it’s best to leave repairs to the professionals.

4. The Control Board Burnt Out

The control board is responsible for sending power to the element. If the control board burnt out, it will need to be replaced. You can buy a replacement control board online or at a hardware store, or you can call a professional that will replace and provide the parts.

Second option is to send the control board to a lab that will test and fix it if possible. If your stove is still not working after replacing the control board, there may be a problem with the power supply or another component of the stove.

The Conclusion

We hope you found this blog post helpful. If you have any further questions, or if you need assistance with repairing your electric stove, please don’t hesitate to contact us. We are always happy to help. Advance Appliance Repair located in North York, ON and available 24/7 a day 365 days a year.


from Advance Appliance Repair https://advanceappliancerepair.ca/electric-stove-not-heating-up-heres-what-you-can-do-about-it/

Advance Appliance Repair On The Web

Advance Appliance Repair 
1 Elmhurst Ave Unit 555
North York, ON M2N 6B1
(647) 363-5208

Advance Appliance Repair Toronto
Advance Appliance Repair Company


from Advance Appliance Repair https://advanceappliancerepair.ca/advance-appliance-repair-on-the-web/

5 Common Issues in Oven Repair: DIY Fixes and When to Call a Professional

Dealing with a malfunctioning oven can be a big hassle, especially when you’re unsure whether to attempt a fix yourself or call in the exper...